Tuesday, July 31, 2012

Fried Smashed Potatoes - So Good!

My friend, Giada, was making these one day while I was watching the Food Network. I sure am going to miss watching the Food Network all day when I go back to work. Do you think they’ll let me watch it a couple of hours a day until I can wean off of it?? I really think it’s only fair. I’m going to miss Ina and Giada and Paula and all of my other friends. I’ll ask about it on my first day. BTW, in case you haven’t heard....I GOT A JOB! Yep, I am going to be a contributing member to society again. Well, let’s just say I have a job and we’ll go from there. I promise my blog won’t suffer. I will try to blog a couple of times a week, but let’s face it, I’ll be happy if I can blog once my first week! Once I get the hang of working again after 8.5 months of unemployment, I’ll get my groove back. Stay tuned and don’t give up! Many more good recipes to come.

(In case you keep up with my blog, you know I have been working for a few weeks now. I wrote a few blogs ahead so I wouldn't disappoint my readers!)
Back to my friend, Giada. She was whipping these up one day and I needed a good idea for a side item because my sister and brother-in-law were coming for a visit. He’s a little (okay, A LOT) picky so I try to stick to the basics but dress them up a little. These little potatoes seemed perfect for that. I mean, come on, who wouldn’t love potatoes with a little oil, parsley and lemon drizzled on top?? These really are tasty. I’ve made them about three times since Giada taught me how to make them. Add them to a family dinner, and I think you’ll add them again and again. Let’s get started.....
Ingredients for the Potatoes:
  • 2 pounds baby or fingerling potatoes (I used little red potatoes)
  • 1/4 cup olive oil, plus extra as needed
  • 3 cloves garlic, peeled and halved

Dressing:

  • 3 tablespoons olive oil
  • 3 tablespoons fresh lemon juice (I used a little less lemon juice, it was a little too lemony for me the first time I made them. Try using 1-2 T, depending on your taste)
  • 2 tablespoons chopped fresh parsley leaves
  • 1 tablespoon chopped fresh thyme leaves
  • 2 lemons, zested
  • Kosher salt and freshly ground black pepper
Directions:
For the potatoes: Put the potatoes in an 8-quart stockpot with enough cold water to cover by at least 2 inches. Bring the water to a boil over medium heat and cook until the potatoes are tender, about 20 to 25 minutes. Drain the potatoes in a colander and allow to dry for 5 minutes. Using the palm of your hand, gently press the potatoes until lightly smashed. I smashed on a sheet of wax paper. See below.


In a large, nonstick skillet, heat 1/4 cup of oil over medium-high heat. Add the garlic and cook until fragrant and lightly brown, about 1 minute. Remove the garlic and discard. In batches, add the potatoes and cook, without stirring, until the bottoms turn golden brown, about 5 to 8 minutes.


Using a spatula, turn the potatoes over and cook, drizzling with oil, if needed, until golden brown on the other side for another 5 to 8 minutes. Mine fell apart a lot when I flipped. They might not have looked as pretty, but they sure did taste good!

For the dressing: In a small bowl, whisk together the oil, lemon juice, parsley, thyme, and lemon zest. Season with salt and pepper, to taste.

Isn't my tiny wisk cute??

Spoon the dressing over the potatoes and toss gently until coated. Season with salt and pepper, to taste.

Transfer the potatoes to a serving bowl and serve. It kind of looks like a hot mess, but trust me, they were delicious!

Thursday, July 26, 2012

Dinner at Bistro Bobette

Yum, Yum, and Yummy! I just have to tell you about my night out with the girls from dinner club last night. This wasn’t our official monthly dinner club, it was an extra night out so that we could participate in Sampling Shockoe Bottom. We do love a reason to go out! We selected Bistro Bobette for our dining experience and we were not disappointed. We had been to this restaurant before and been pleased, but when I looked up their menu online for this special week my mouth started watering. They had me at “savory tart with goat cheese and caramelized onions”. Man, doesn’t that just sound delicious? They started off strong with that and kept it going through every course. The deal during Sampling Shockoe is that you select a dish from each category; appetizer, main course and dessert for $30. Great deal, right? As you guessed, I ordered the savory goat cheese tart for my appetizer and it was to die for! Actually, we all got the savory tart. The plates arrived and silence commenced while we all devoured it. I wish I had a piece now. Man, that was good. Check out that picture, doesn’t it look so tasty? Well, it was. Trust me……and I’ll be remaking that one at home soon!


For my next course I selected the Rainbow Trout w/ almonds and capers served with French String Beans. Now don’t get me wrong, this was really tasty, but Terry’s dish won the night. She ordered the Mixed Grill which was pork, beef aiguillette (no idea what that second word is, but it was like a tenderloin sliced), lamb sausage with polenta. Man, that beef blah blah was so good! Denise and I both tasted Terry’s and wished we had ordered it. We enjoyed ours, but Terry’s was mighty fine. Denise got the swordfish. Again, not bad, but it was no Mixed Grill. If that is on the menu when you go, order it!


To finish off the night we all were served our desserts. I had the chocolate mousse which was awesome! Very rich and creamy, as a mousse should be. Perfect size too! Terry got some kind of made up berry crème brulee’, which she enjoyed, but I did not sample. Crème brulee’ has the consistency of baby food to me so I’m not a fan. Sorry. Denise had a cherry tart and it was tasty too. I’ll have to say, we were all pleased once again with our selections. All three courses were a hit!


If you are venturing out to Sample Shockoe this week, but Bistro Bobette on your list! Heck, just put it on your list anyway!

Wednesday, July 25, 2012

Creamed Spinach

Ahhhhh......remember when I could watch cooking shows all day long and then try out the recipes??? Big sigh....... I do. Good times, good times. Well, I still enjoy the cooking shows when I can squeeze them in and this recipe is thanks to my buddy, Anne Burrell. I’m not a big fan of spinach without all of the creamy goodness though. Of course, the way I like it really adds the calories, but not this recipe! Instead of heavy cream, Anne used milk and I went one step farther and used skim milk. This was really delicious and I didn’t feel like I was missing a thing without the heavy cream. Very tasty side dish!
Here’s what you need to do to get started:

Ingredients

  • Extra-virgin olive oil
  • 2 1/2 pounds washed baby spinach
  • 1/2 small onion, finely diced
  • Kosher salt
  • 2 cloves garlic, smashed
  • 2 tablespoons butter
  • 2 tablespoons all-purpose flour
  • 1 cup milk
  • Pinch cayenne pepper
  • 1/4 cup grated Parmesan cheese

Directions

Coat a large, straight-sided saute pan with olive oil and heat over medium heat. Add the spinach, cover and saute until gently wilted. Remove the spinach from the pan to a colander set inside a bowl to let the spinach drain and cool.

Remove any liquid from the bottom of the saute pan and coat lightly with olive oil. Heat the oil over medium heat, add the onions, and season with salt, to taste. Saute the onions until they are translucent and very aromatic, about 5 to 7 minutes. Add the garlic and saute for 2 to 3 more minutes. Add the butter, and when melted stir in the flour. Cook until it is the texture of wet sand, about 5 to 6 minutes. Whisk in the milk, cayenne pepper and Parmesan. Taste for seasoning and season with salt, if needed, (it will). Bring the milk to a boil, then reduce the heat and simmer for 5 to 6 minutes, stirring occasionally, so the milk doesn't scorch on the bottom.

Add in the reserved spinach and stir to combine. Taste and adjust the seasoning, if needed. Transfer to a serving bowl and serve.
Enjoy!!
Creamed spinach isn't really that photogenic, is it, but it sure was tasty!

Sunday, July 22, 2012

Chicken Piccata

 
Who knew making chicken piccata could be so easy??? Well I didn’t. I like to order it in restaurants and eat it, but I had no idea it was just a few ingredients thrown together. It really is simple. Thank goodness my friend, Giada, showed me the light and now I can quickly whip up chicken piccata like a real chef....which I practically am! David claims he doesn’t like capers, but he almost licked his plate tonight! He actually might have while I went back for seconds!
 
This is so simple...just cook the chicken in butter and olive oil, throw in some lemon juice, chicken stock (of course I used homemade) and capers and viola, you’ve just made Chicken Piccata! Would you like to learn how to make it to? Well, I will be your Giada and show you the way. Here’s what you need to get started.
 
Ingredients
  • 2 skinless and boneless chicken breasts, butterflied and then cut in half
  • Sea salt and freshly ground black pepper
  • All-purpose flour, for dredging
  • 6 tablespoons unsalted butter
  • 5 tablespoons extra-virgin olive oil
  • 1/3 cup fresh lemon juice
  • 1/2 cup chicken stock
  • 1/4 cup brined capers, rinsed
  • 1/3 cup fresh parsley, chopped
Directions

Season chicken with salt and pepper. Dredge chicken in flour and shake off excess.


In a large skillet over medium high heat, melt 2 tablespoons of butter with 3 tablespoons olive oil. When butter and oil start to sizzle, add 2 pieces of chicken and cook for 3 minutes.


When chicken is browned, flip and cook other side for 3 minutes. Remove and transfer to plate. Melt 2 more tablespoons butter and add another 2 tablespoons olive oil. When butter and oil start to sizzle, add the other 2 pieces of chicken and brown both sides in same manner. Remove pan from heat and add chicken to the plate.


Into the pan add the lemon juice, stock and capers. Return to stove and bring to boil, scraping up brown bits from the pan for extra flavor. Check for seasoning.


Return all the chicken to the pan and simmer for 5 minutes. Remove chicken to platter. Add remaining 2 tablespoons butter to sauce and whisk vigorously. Pour sauce over chicken and garnish with parsley.

So easy and so delicious! I'm still licking my lips over this one. The lemon juice and capers make it so flavorful. Try it! Want to see it again?? Okay, here you go....


Thursday, July 19, 2012

Basil Chicken

Have I mentioned that I love me some Food Network??? Well, I really do. This recipe isn’t from one of my regulars though, this is from Sandra Lee’s Money Saving Meals. She has good stuff too. This might be the first recipe I’ve tried of hers though. You know, I’m always so busy with Giada and Ina. They do take up a lot of my time.....well, they used to before I had a job! Sigh.....it’s fine though. I can cook, work, blog and and make it all work! See, my blog isn’t suffering. You are still getting great recipes. Right?? I think I heard a “right” out there! Thanks!
Let’s get started on this yummy Basil Chicken. I used brown rice so the rice and chicken kind of blend together on the plate for the picture and it doesn’t look at eye-appealing as it should. I should have used a colored plate to make it pop! I’ll try that next time. Okay, here’s what you need to get started:
I thought a visual aid might help with some of the ingredients. I wasn't sure what a serrano pepper looked like myself so hopefully this will help you too.
Ingredients:
  • 2 cups white rice (I used brown)
  • 2 chicken breasts, sliced
  • 2 tablespoons olive oil (use more oil as needed)
  • 1 medium onion, sliced
  • 1 green bell pepper, sliced
  • 1 small serrano chile pepper, sliced in half
  • 1 tablespoon chopped garlic
  • 4 teaspoons brown sugar
  • 4 teaspoons low-sodium soy sauce
  • 4 teaspoons fish sauce
  • 1 cup fresh basil leaves (which I picked from my herb garden!)
  • 1 lime, juiced
  • Directions:
  • Cook rice according to instructions on package.
    Remove the chicken breasts from the bone and slice into thin strips. In a large wok or skillet over high heat, add the oil. When the oil is hot, add the chicken and stir-fry until it is almost completely cooked through, 3 to 4 minutes. I used chicken that I had previously cooked making my homemade chicken stock so I started the onions and peppers first and then added the cooked chicken. If you are using raw chicken, start with cooking chicken first. Add the onions and peppers and cook until slightly softened but still crisp, about 3 minutes. I like mine a little softer so I cooked a little longer. Add the chile and garlic and cook 1 minute.


    To a bowl, add 4 tablespoons water, brown sugar, soy sauce, and fish sauce. Stir and pour over the chicken and onions and cook for another minute. Add the basil and remove from the heat once it has wilted. Add the lime juice into the chicken mixture and stir.


    Serve hot over rice and Enjoy!

Tuesday, July 17, 2012

Microwave Fresh Corn = No Silks! No Kidding!

Yes, it’s true. Microwaving corn can remove the silks for you! Sounds crazy, but it’s true. My dad just read about this tip and shared it with me and I’ll never cook fresh corn on the cobb the same way. It will change your life! So here’s your tip of the day......
Take a fresh ear of corn and do nothing to it. I mean it, don’t shuck it, don’t cut off the end, don’t pull the strange hair off of the end, just place the entire ear (husks and all) into the microwave. Microwave at least 4 minutes per ear of corn. I found that less is not enough, but 4 per ear is perfect. You might like yours softer, so add another minute or so if you’d like.
When the ears have cooked, remove from microwave and cut off about an inch from the bottom.
Start squeezing the ear from of the top so it slides through the opening and you will find the cleanest, prettiest, best tasting ear of corn you’ve ever eaten! How cool is that?? I was a bit skeptical when my dad first told me about it, but I tried it and now I’m hooked! My husband says he’s going to buy a bushel of corn this weekend! Well, he might be overstating just a bit. Maybe we’ll buy a few more ears and cook it this way again.
So easy! Try it and let me know if you like it.

Thursday, July 12, 2012

Lemon (Very) Garlic Chicken


Again, watching the Food Network yielded a lovely dinner for David and I one night. He's so lucky, isn't he?? ;-) I'll assume your answer was yes and I'll remind him of that. One of my dear friends, Ina, was making this delicious looking meal so I had to give it a try. What are David and I going to eat when I go back to work?? I'll miss all of these shows which give me these great recipes to try. Are we going back to spaghetti and tacos?? Oh no! I need my Food Network!! I foresee this job really getting in my way. I hope it's worth it!

As I've stated in the title, this dish is Very garlicky so be prepared. Luckily, we love garlic, so it was great to us. If you don't love garlic, you probably won't love this dish. You could back down the garlic though and still make a delicious meal. This is very flavorful the way it's prepared. Let's get started:
Ingredients
  • 1/4 cup olive oil
  • 3 tablespoons minced garlic (9 cloves)
  • 1/3 cup dry white wine
  • 1 tablespoon grated lemon zest (2 lemons)
  • 2 tablespoons freshly squeezed lemon juice
  • 1 1/2 teaspoons dried oregano
  • 1 teaspoon minced fresh thyme leaves
  • salt and freshly ground black pepper
  • 1 lemon
  • 4 boneless chicken breasts, skin on (6 to 8 ounces each). Ina says to use breasts with skin on, but I had thighs with skin off in the freezer so that’s what I used.
Directions
Preheat the oven to 400 degrees F.
Warm the olive oil in a small saucepan over medium-low heat, add the garlic, and cook for just 1 minute but don't allow the garlic to turn brown.
Look at all that garlic! I can smell it from here!

Off the heat, add the white wine, lemon zest, lemon juice, oregano, thyme, and 1 teaspoon salt and pour into a 9 by 12-inch baking dish.


So much flavor in that pan!

Pat the chicken breasts dry and place them skin side up over the sauce. Brush the chicken breasts with olive oil and sprinkle them liberally with salt and pepper. Cut the lemon in 8 wedges and tuck it among the pieces of chicken.

Bake for 30 to 40 minutes, depending on the size of the chicken breasts, until the chicken is done and the skin is lightly browned. If the chicken isn't browned enough, put it under the broiler for 2 minutes.

Cover the pan tightly with aluminum foil and allow to rest for 10 minutes. Sprinkle with salt and serve hot with the pan juices. Serve with a rice or starch so you can make the most of the garlic lemon sauce. Delish!

Monday, July 9, 2012

Freeze your own blueberries


Hi Everyone, Happy Monday! Today is my first day on my new job (yippee!) so I'll give you a simple tip that I thought was really cool. Don't worry, more awesome recipes coming, but I thought you'd like some tips too.

It's so easy to freeze your own blueberries and other fruit so you can stock up when you can get it on sale. Who knew?? I'm sure I can't be the only one out there who never discovered the art of freezing berries so I wanted to share. It's wonderful having fresh blueberries to bake with all year long. I know it seems simple, but I just wanted to post this tip that I found helpful.


Line a cookie sheet with wax paper (this makes it easy to pick them up), sprinkle the blueberries on top and place in the freezer for a couple of hours or overnight. Remove the baking sheet and place berries in a freezer bag.  If you used wax paper, you can pull up the paper and just pour them all in a baggie. Placing them on a baking sheet first keeps them from freezing in clumps. This is the perfect freezing method. I've done the same with strawberries .....just clean and cut off stem first.


I do this for all of our fruit for smoothies. So easy and helpful! Happy freezing!

Friday, July 6, 2012

Drunken Spaghetti


Man, this dinner really will make you want to slap somebody! I’m not even kidding.  I know, I had to slap my husband because it was so good. We just finished this delicious dinner and I have to blog about it while it’s still fresh on my mind. My husband is still going on about it. He LOVED it. He kept commenting on how flavorful this was. He wanted me to quote him as saying, “this is the best Blogalicious meal yet! Try it. Make it. Eat it.” His words, not mine, but I would have to agree with him. This was a mighty fine meal and my house still smells like an Italian restaurant.

This time I was watching the Cooking Channel (switching it up) and Rachel Ray’s show was on where she cooks a weeks’ worth of meals. That’s a pretty good show and I might have to start preparing our meals that way since I have to join the working world again. She was making a couple of tasty looking dishes, but this one really caught my eye. I couldn’t wait to make it and tonight was the night! You should definitely take David’s advice and make it.....soon! Here’s what you need to get started.

Ingredients


  • 2 tablespoons EVOO   

  • 5 ounces Calabrese salami or good-quality pepperoni, casing removed, grated with a box grater. (I used pepperoni) 
  • 1 pound ground lamb or beef (I used ground turkey and it was just as good)
  • Kosher salt and freshly ground pepper
  • 4 cloves garlic, grated or finely chopped
  • A couple sprigs fresh rosemary, very finely chopped
  • 1 bay leaf
  • 1 carrot, grated
  • 1 medium onion, very finely chopped
  • 3 tablespoons tomato paste
  • 1 bottle plus 1 cup dry red wine
  • 1 cup chicken stock
  • Two 28 ounce can whole peeled San Marzano tomatoes
  • 1 pound spaghetti
  • 1 Tablespoon dried oregano
  • 1 Tablespoon dried basil
  • A few fresh basil leaves, torn
  • Grated parmesan, for garnish before serving

    Directions

  • Heat the EVOO in a Dutch oven or other large pot over medium-high heat. Add the salami and cook until the fat is rendered.


  • Add the ground lamb and cook, crumbling with a wooden spoon, until browned. Season with a little salt and more pepper.

    Add the garlic, rosemary, bay leaf, carrots and onions and cook until soft, about 5 minutes.

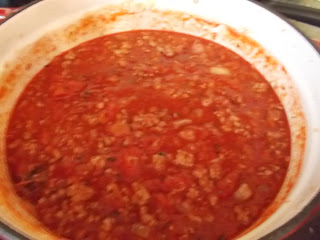
     Add the tomato paste and cook, stirring, for 1 minute. Deglaze with 1 cup wine, stirring and scraping up any browned bits from the bottom of the pot with a wooden spoon. Add the stock, oregano, basil and tomatoes, breaking up the tomatoes with the spoon, and simmer until thickened, 30 minutes.


    Bring the remaining 1 bottle wine and 2 cups water to a boil in a pot. Add the pasta and cook until al dente.


    Reserve about 1 cup starchy cooking liquid and drain the pasta. Toss the pasta with the sauce and enough of the reserved cooking liquid to bring the dish together. I didn’t need any of the reserved liquid so wait before adding to make sure you need it. Divide among shallow bowls and top with the basil and lots of parmesan cheese.


    Cook's Note: The sauce can be covered and refrigerated for a make-ahead meal. Reheat over medium heat, partially covered. Remove the bay leaf before serving.

    Seriously, if you've been waiting to try out one of my recipes, try this one. It was so flavorful and delicious. I don't think you'll regret it! Enjoy!!

    P.S. I don't know what is wrong with the formatting in this blog. I can't make it cooperate!

    Thursday, July 5, 2012

    Yellow Squash, Zucchini & Feta Casserole

    One of my favorite casseroles ever! I found this recipe on allrecipes.com, made a few changes, threw on some feta, and now it’s perfect! I LOVE squash, especially the ones picked fresh from my daddy’s garden. They just taste better. I love yellow and zucchini squash so this recipe was right up my alley. Well, to even take it further, I love tomatoes cooked in anything and feta is my favorite cheese so this just got even better when I threw the the feta on top. This casserole has all of my loves, so it is perfection!
    This is easy to assemble, just like a vegetable lasagna. I slice the vegetables length-wise, but you can certainly slice them any way you’d like. It will still taste delicious. My dad made this and added a layer of Vidalia onion. That’s probably pretty tasty too. Feel free to throw that on if you’d like.
    Here’s what you need to get started:


      Nice size squash, right?? Thanks Terry.
      
    • Ingredients

    • 2 medium yellow squash
    • 2 large zucchini
    • 2 large tomatoes, sliced
    • 2 cups grated Italian blend cheese (or really whatever you like)
    • 1/2 cup butter, divided
    • 2 T Italian seasoning
    • 1/4 c feta cheese (or really how ever much you’d like. Sometimes I use more because it makes me happy)
    • salt and pepper to taste

    Directions

    Preheat oven to 375 degrees F

    Cut the zucchini and squash into long, thin layers. Lightly grease a 7x11-inch baking dish and layer the squash, zucchini, and tomatoes into the baking dish.


    Sprinkle with grated cheese and add pats of butter between each layer of vegetables, and season each layer with salt, ground black pepper to taste, and Italian seasoning.

    Continue this layering process until all the vegetables are used up and top this off with the remaining butter and grated cheese and feta.


    Cover and bake at 375 degrees F for 20 to 30 minutes, or until vegetables are to desired tenderness and cheese is melted and bubbly.

    Take off lid during the last 10 minutes so the cheese will brown.

    Looks yummy, doesn't it??
    Now all you have to do is eat and enjoy!

    Sunday, July 1, 2012

    Delicious Dinner at Mint in RVA


    If you live in Richmond, you should try the new restaurant, Mint. I went there with my girlfriends last week for our monthly dinner club and we were all really pleased with everything. Of course, how bad can a meal be when it starts off with fried pickles?? They were delicious!! However, here’s a warning, if you don’t like dill pickles, don’t order them! We may or may not have misled a friend to taste them and she immediately made a sour face and looked for somewhere to discard of the fried pickle. But if you like dill pickles (and yes you do Terry), then you’ll LOVE this appetizer!
     
    This restaurant is located in the space that was formally Davis & Main. They’ve lightened up the place and it really looks nice now, not as dark and dreary as it was before. We also had great service, Mary, was a very attentive server. That’s for you, Terry.
     
    The photo above is my meal. Pan roasted flounder with a roasted red pepper sauce. You think that's sounds yummy, just wait, there's more. It was served with cheese grits and collards. So delicious! Well, Terry said the collards were delicious and I'll just have to take her word for that one. Oh, and don't forget the warm corn bread they brought to the table a couple of times. Sweet and delicious!
     
    Give this place a try. We also sampled the bacon wrapped dates. I would have never ordered these, but they are known for them and we were all really pleased. Who knew I liked dates?? Shhhh....don't tell my parents. The other girls had hamburgers, quiche and steak and everyone was satisfied. We left happy!
     
    Put Mint on your list of places to try in Richmond!