Wednesday, February 12, 2014

THE Nestle' Toll House Chocolate Chip Cookies


We moved to GA from VA and had hoped we would escape the snow and super cold winters. Well, that didn’t work out this year. They are using the word “catastrophic” to describe the snow and ice heading our way tonight. Well, I had to jump into action and do what I could to make sure we are ready. Run to the grocery store? No! Make sure we have enough water, milk and bread? No! Salt the driveway? No! I immediately started a pot of chicken and rice soup (recipe coming soon) and then realized we needed a dessert too. How else could we make it through the storm without snacks and desserts??  You won’t believe this, but I’ve never made Nestle Toll House Cookies! I know, I can’t believe it either. I’ve eaten plenty in my time though. We all know what I decided to make now, right? Yep, for the first time ever  I made Toll House cookies. We mostly wanted them for the cookie dough, but I did end up baking some of them. Man, that is the best cookie dough ever. They are so quick and easy too......and so delicious. I know you can find this recipe everywhere, but now you can find it on my blog too! Other sites won’t have my humorous commentary either! Let’s make some cookies:


Ingredients:

  • 2 1/4 cups all-purpose flour
  • 1 teaspoon baking soda
  • 1 teaspoon salt
  • 1 cup (2 sticks) butter, softened
  • 3/4 cup granulated sugar
  • 3/4 cup packed brown sugar
  • 1 teaspoon vanilla extract
  • 2 large eggs
  • 2 cups (12-oz. pkg.) NESTLÉ® TOLL HOUSE® Semi-Sweet Chocolate Morsels
  • 1 cup chopped nuts (optional – I didn’t add them this time)
Directions:
 

Preheat oven to 375° F.

Combine flour, baking soda and salt in small bowl. Beat butter, granulated sugar, brown sugar and vanilla extract in large mixer bowl until creamy. Add eggs, one at a time, beating well after each addition. Gradually beat in flour mixture. Stir in morsels and nuts, if desired.


or you could just eat the dough like we did!


Drop by rounded tablespoon onto ungreased baking sheets. The dough is just so beautiful.....and quite tasty!

Drop a few on cookies sheets, and a few in your mouth.....just a suggestion!

Bake for 9 to 11 minutes or until golden brown. Cool on baking sheets for 2 minutes; remove to wire racks to cool completely. That is, if you can wait 2 minutes after smelling fresh chocolate chip cookies baking......we couldn't hence the numbness in the roof of my mouth where the hot chocolate chips burned it. BTW, totally worth it!

Nestle offered this option on their website, I might try it next time. Little squares of goodness sound like something I’d like to try too.


PAN COOKIE VARIATION: Grease 15 x 10-inch jelly-roll pan. Prepare dough as above. Spread into prepared pan. Bake for 20 to 25 minutes or until golden brown. Cool in pan on wire rack. Makes 4 dozen bars.


    Wednesday, February 5, 2014

    Nutella Pochettes


    Now that we are pretty much settled in our Georgia home, I’ve been trying some new recipes.....and Thank God I did! I mean, just WOW! These Nutella Pochettes are to die for! Don’t worry, I didn’t know what a pochette was either. It’s basically a turnover, but this is a Nutella filled turnover? What?? Yes, delicious dough filled with the chocolaty deliciousness of Nutella! Thank goodness I've had time to watch more Food Network and find this little treasure. Yes, I know I have a recent blog with Nutella, but who can have too much Nutella?? No one!

    We had our own little Superbowl party and I made these for our dessert and let me tell you, these will make you want to slap somebody! Take a bite of them fresh out of the oven.....YUM! Well, honestly, I did burn my lip just a little when the chocolate oozed out so I think I’ll recommend waiting just a few minutes, if you can. They are just the perfect little treat AND I made homemade dough! I know, I can’t believe it either, but I did! It was super easy too. Just three ingredients and I had a flaky and delicious dough. Should I see how many times I can use the word “delicious” in this blog? Okay, I guess you got the message, these are really really really good! I’m happy to share my recipe with you. Here’s what you need to get started:

     
    Ingredients:
     

    • 1 cup (2 sticks) butter, at room temperature
    • 8 ounces cream cheese, at room temperature
    • 2 cups all purpose flour
    • about 1/2 cup chocolate-hazelnut spread (recommended: Nutella)
    • Water, as needed
    • 1/4 cup confectioners' sugar
     

    Directions:
     
    In a medium bowl, using a hand mixer, cream the butter and cream cheese together until light and creamy. Add the flour slowly until the dough forms. Do not over-mix!

    Shape the dough into a ball and cover. That's my homemade dough ball. :-) Let the dough rest in the refrigerator for 30 minutes.

    Look! I made dough!

    Preheat the oven to 375 degrees F while we get started on assembly.

    On a lightly-floured surface, using a lightly-floured rolling pin, roll out the dough to 1/8-inch thickness.
    Keep rolling until it's a little thinner

    Using a 3-inch fluted biscuit cutter, cut out as many circles as you can. Form the scraps into a ball and reroll to make more circles. I didn't have a regular biscuit cutter, much less a fluted one, so I used a glass. Anything that is a circle will most likely work.


    This made about 15 for me, but the recipe said it should make 32. Hmmmmm.....I think I’ll roll the dough a little thinner next time.


    Fill each dough circle with a small spoonful of the chocolate-hazelnut spread.  Don't overfill or spread around. Trust me, a spoonful is plenty and it will fill out the pasty shell.

    What a beautiful sight!

    Dip your finger in tap water and spread on the edge of half the circle to help create a seal. Fold the dough over to create a crescent.


    Bake until golden, about 15 minutes. Cool, then sift the confectioners' sugar on top and serve. Don’t sprinkle sugar on until cool, it will appear wet and gummy on top.

    Don't those look pretty? Wait until you sprinkle with powdered sugar!

    If you decide to share these, you will have some happy friends and family! Enjoy!

    Sunday, February 2, 2014

    Pizza Dip

     
    Hi everyone! I’m so sorry that I’ve been gone for so long! I have a good excuse though.....well, it’s all I have right now so let’s all pretend it’s a good enough reason to have neglected my blog for 2 months! I’m so sorry! I know you’ve been dying for my blogs, wondering what I've been cooking. Your life is nothing without me. Okay, maybe I went to far, but hopefully someone has missed my blogs. :-) We moved back home to Atlanta from Richmond, VA. In case any of you were wondering, packing and moving is no fun. Not even a little bit. But lets not focus on my move, let’s get back to my blog since I’ve neglected you for so long. I promise to never let this happen again. And for a special little treat, I’m going to give you a super simple recipe for one of the best dips you’ve ever tasted. This will be your go-to dip recipe from now on. Trust me. A neighbor of ours, Maria, brought this to a party and we devoured it! She was kind enough to share the recipe with me.....a few times because I kept losing it. Thanks Maria!

     This is a tasty pizza dip. It’s so easy and you can add ingredients to really kick it up a notch. Let’s start simple first, since that’s what I promised you. Here’s what you need to make a little bit of heaven:

     Ingredients:

    8 oz. cream cheese, softened
    1/2 cup of sour cream
    1/8 tsp. red pepper flakes
    1/2 tsp. garlic powder

    1/2 cup pizza sauce
    1/2 cup mozzarella cheese


    Instructions:
     
    Mix cream cheese, sour cream, pepper flakes and garlic powder together and spread on pie plate forming a bottom layer.


    Top with 1/2 cup pizza sauce


    And 1/2 cup of mozzarella shredded cheese to top, make sure top is covered with the cheese.


    Bake at 350 for about 10 minutes.  Serve with bagel chips, triscuits or pita chips. Delish!


    Could it get any easier than that?? You could also add pepperoni to a layer or add feta to the topping for more flavor. Either way you make it, you and your guests will love it! Enjoy!

    Friday, November 15, 2013

    Nutella Brownies - To Die For!


    O-M-G! These are the best brownies I’ve ever put in my mouth! How can you go wrong with a whole jar of Nutella, right? They are super moist and delicious! Just look at that picture....you can practically smell them and taste the moistness. Throw away every brownie recipe you have and only make this one from now on. I’m serious, they are THAT delicious! I made them for my first Stella & Dot party and made them again the next day for another party. I wanted to make sure all of my friends got a taste.....and maybe I needed another one for myself. Oh, did I tell you that I’m a Stella & Dot Stylist now?? Well I am and I’ve very excited about it. This is where I should plug my personal website www.stelladot.com/dawnstewart

     Now back to the brownies.....They are so easy to make too. I love a quick and easy, but still homemade recipe. Here’s what you need....first important ingredient:
    Nutella isn't paying me, I just happen to think this is the best ingredient EVER!


    Ingredients:

     
    • 1/2 Cup All-purpose flour
    • 1/4 Teaspoon salt
    • 2 eggs
    • 1 Cup Nutella (one small jar is perfect)
    • 1/2 Cup brown sugar
    • 1 Teaspoon vanilla extract
    • 1/2 Cup melted unsalted butter

     Directions:
     
    • Preheat the oven to 325°F and make sure the rack is in the middle of the oven.
    • Butter all sides of the pan thoroughly.
    • Combine the flour and salt in a medium bowl and set aside.
    • In another bowl, beat the eggs, hazelnut spread, brown sugar and vanilla extract with an electric mixer until smooth, about 2 minutes.
    • With the mixer on low speed, add the flour mixture, alternating with the melted butter.
    This could be a good point to taste it and make sure everything tastes okay.....just a little quality control for my peeps.
     
    • Scrape the batter into the cake pan. Bake until a toothpick inserted in the center comes out with a few crumbs attached (not completely clean), 35 to 40 minutes.
    • Cool in the pan for about 2 hours. Remove and cut into squares. Or if you’re like me, wait about 5 minutes, cut out a little piece and enjoy while it’s really warm! Look at that picture, how could you resist??
     

    Thursday, October 24, 2013

    Roasted Potatoes and Onions

     
    Who doesn’t love a good potato recipe? If you don’t, you’re not normal! Potatoes are delicious, an all American food, right? Well, I’ve roasted them with rosemary, parmesan, herbs and just salt and pepper so I thought I’d throw in some onions, lots of garlic, more herbs and make roasted potatoes seem new with a roasted potato AND onion dish. Throw in the onions and it’s a totally different dish. It’s like it’s brand new and you’ve never seen it before. Okay, if you don’t think it’s creative and fresh, don’t tell me! Either way, this was really tasty and the onions caramelized a bit and made it even better. And oh, don’t forget the punch from the garlic. De-lish! Give this one a try. Here’s what you’ll need:

    Ingredients:

    • 2 pounds red skinned potatoes, cut in 1 1/2 to 2-inch chunks
    • 1 large sweet onion, cut in large chunks
    • 4 to 5 cloves garlic, minced
    • 1 teaspoon salt
    • 1/4 teaspoon freshly ground black pepper
    • 1/4 teaspoon dried thyme (or whatever herbs you choose, I added rosemary too)
    • 3 tablespoons olive oil

    Preparation:

    Spray a large shallow baking dish with cooking spray or lightly grease. Heat oven to 400°.
    Combine all ingredients in a large bowl or food storage bag; toss to coat thoroughly.
    Arrange in the baking pan or cookie sheet
     
    and bake for 30 to 40 minutes, until potatoes are tender and nicely browned.
    Serves 4 to 6. Enjoy!
     

    Sunday, October 6, 2013

    Roasted Broccoli


    I wouldn’t normally get excited about broccoli, but let me tell you, I’ll never go back to the old way I cooked broccoli! This way was delicious and now there is no turning back! I found this on Pinterest a few months ago and have been meaning to try it, but always forget. Well, tonight was the night and boy am I pleased about it! It couldn’t have been easier and roasting it in the oven gave it such great flavor.....the garlic didn’t hurt either! I mean, it is broccoli and how excited could we all get about broccoli, right? Well, now I’m not going to eat broccoli because my body needs a green vegetable in it, now I’m going to eat it because it’s delicious and I love it! How about that?? My dad my be fainting right now because I was a very picky child. Not anymore, I’m all grown up!


    The pinner who pinned this said she’d never cook broccoli any other way and I was like....”yeah right. What’s so great about roasting some broccoli??” Boy was I wrong. This was crunchy and flavorful and just delicious. I highly recommend giving this a try! It’s so easy, you can’t mess it up.


    Ingredients:

     
    Fresh broccoli crowns (whatever quantity you need)

    2-3 tablespoons olive oil

    1 tablespoon minced garlic

    salt and pepper to taste


    Directions:
     
    Chop up the into edible size pieces and place in a bowl or large zip lock bag. Drizzle with olive oil, salt, pepper and add minced garlic. Toss so that broccoli is well coated with all ingredients.   Then spread on a cookie sheet lined with aluminum foil. 

    Roast at 425 degrees F for 20-25 minutes. Remove from oven and enjoy! Trust me, you’ll love it!

    Wednesday, October 2, 2013

    Spicy Chicken Legs

     
    I'm baaaaack! I’m sorry to keep you hanging for such a long time, but hopefully I can get back to regular cooking and blogging soon. I know you’ve missed me.  :-) Okay, well at least I’ve missed telling you about my latest and greatest recipes that I’ve found. This one is from one of my favorite cooks now, The Pioneer Woman. She cooks some great and simple stuff. Love her show and her cookbooks. I wish I had a little extra house like she does too. I’ll live in her “lodge” any day of the week!

     
    I love chicken and dark meat chicken is just the bomb! It’s so juicy and delicious. Yes, I know the white meat is better for me, but if I want some awesome flavor I’m going for a thigh or a leg. That’s what the money is! As my friend, Guy, would say. Let’s get to cooking some spicy chicken legs......


    Ingredients:
     
    • 24 whole Chicken Legs
    • 2 sticks Butter
    • 1 Tablespoon Hot Salt or Cayenne (or your favorite seasonings)
    • 1/2 cup Lemon Juice

    Instructions:

    Melt 2 sticks of butter in a saucepan. Pour ½ cup of lemon juice (fresh or bottled). Now add your seasonings. In this case, 1 tablespoon of Morton’s Hot Salt (which I did not have). You can use whatever seasonings you have on hand. You could use minced garlic, salt and Cayenne pepper. If you want them spicy, like the name says, then go with Cayenne if you don’t have Hot Salt. Stir it together until combined.


    Rinse and pat your chicken legs dry. With metal tongs, transfer them one by one into the butter mixture and place on a baking sheet.
     
    Once all of the chicken legs are coated and on the baking rack, take a pastry brush and give them one last coating of the butter mixture. Sprinkle them with some more of your seasonings.


    Place them into a 400-degree oven for 30 minutes. If they need a bit more color, turn on the broiler for a couple minutes and watch them closely. Remove them when they are nice and golden brown.


    Wasn’t that easy? You and your family will thank me later. You can adjust the heat by adding more or less seasoning. I would go with a little more because the butter dilutes it a bit. I'll shake a little more on before I put them in the oven next time. Either way, they are delicious though! Enjoy!

    Friday, September 27, 2013

    Brunch at the Egg & I


    Okay, I know I've fallen behind on my blogging and I am really sorry about that. We are living like vagabonds between Georgia and Virginia and I just ended my job. We've had a lot going on but I promise to get better. Maybe while I'm not working I'll have time to watch more cooking shows and get back to blogging.....the important things in life.  I've missed my friends Ree, Giada and Ina. 

    Just so you know, I am writing this while on an 8 hour road trip with my husband and two dogs. I'm typing it on my iphone. Are you impressed now?? Probably not, right?

    While we wait on more interesting blogs, let's check out an awesome meal I had recently. The hubby and I tried a new brunch spot, The Egg & I, and it was surprisingly delicious! We both went for the pancake, yes that's singular. Check out the pic and you'll see why. It was huge! Bigger than a newborn baby! I went for blueberry, of course. Mine was served with a warm compote that was also yummy.  I probably ate a third of this massive pancake. I'm not THAT much if a pig!

    All in all, great new spot and go with someone to share a pancake!

    I promise a new recipe soon! Stay tuned...

    Wednesday, August 21, 2013

    Easy One Pot Tomato Basil Pasta


    Okay, everyone has been posting this easy one pot recipe on Facebook and pinning it on Pinterest so I HAD to try it. I had to do it for my readers. We needed to see what was so great about this and if it was as easy as it looked. Well, I’m here to tell you....it was all those things! Super easy and pretty darn tasty too. It’s awesome that everything goes in one pot, even the uncooked pasta. What an genius idea! It’s so awesome,  I have to share it with you guys. This is perfect for a quick meal after a long day at work. Throw in some chicken or shrimp and you really have a great meal. Here’s what you need to make this yummy dish.

     
    Ingredients:


    12ounces pasta (I used thin spaghetti because I like it best)
    1can (15 ounces) diced tomatoes with liquid ( I used Italian style)
    1large sweet onion, cut in julienne strips
    4cloves garlic, thinly sliced
    ½teaspoon red pepper flakes
    2teaspoons dried oregano leaves
    2large sprigs basil (about 10 leaves), chopped
    cups vegetable or chicken broth (I used about 1 cup of white wine and the rest homemade chicken broth for better flavor). Can also use water.
    2tablespoons extra virgin olive oil
    Parmesan or feta cheese for garnish (or whatever cheese tickles your fancy)

    Directions:

    Place pasta, tomatoes, onion, garlic, basil, in a large stock pot.

    Pour in vegetable or chicken broth. Sprinkle on top the pepper flakes and oregano. Drizzle top with oil.


    Cover pot and bring to a boil. How easy is that? Reduce to a low simmer and keep covered and cook for about 10 minutes, stirring every 2 minutes or so. Cook until almost all liquid has evaporated. Season to taste with salt and pepper , stirring pasta several times to distribute the liquid in the bottom of the pot.

    Serve garnished with Feta or Parmesan cheese and maybe a fresh sprig of basil. Everything is better with feta, right??


    Thursday, August 15, 2013

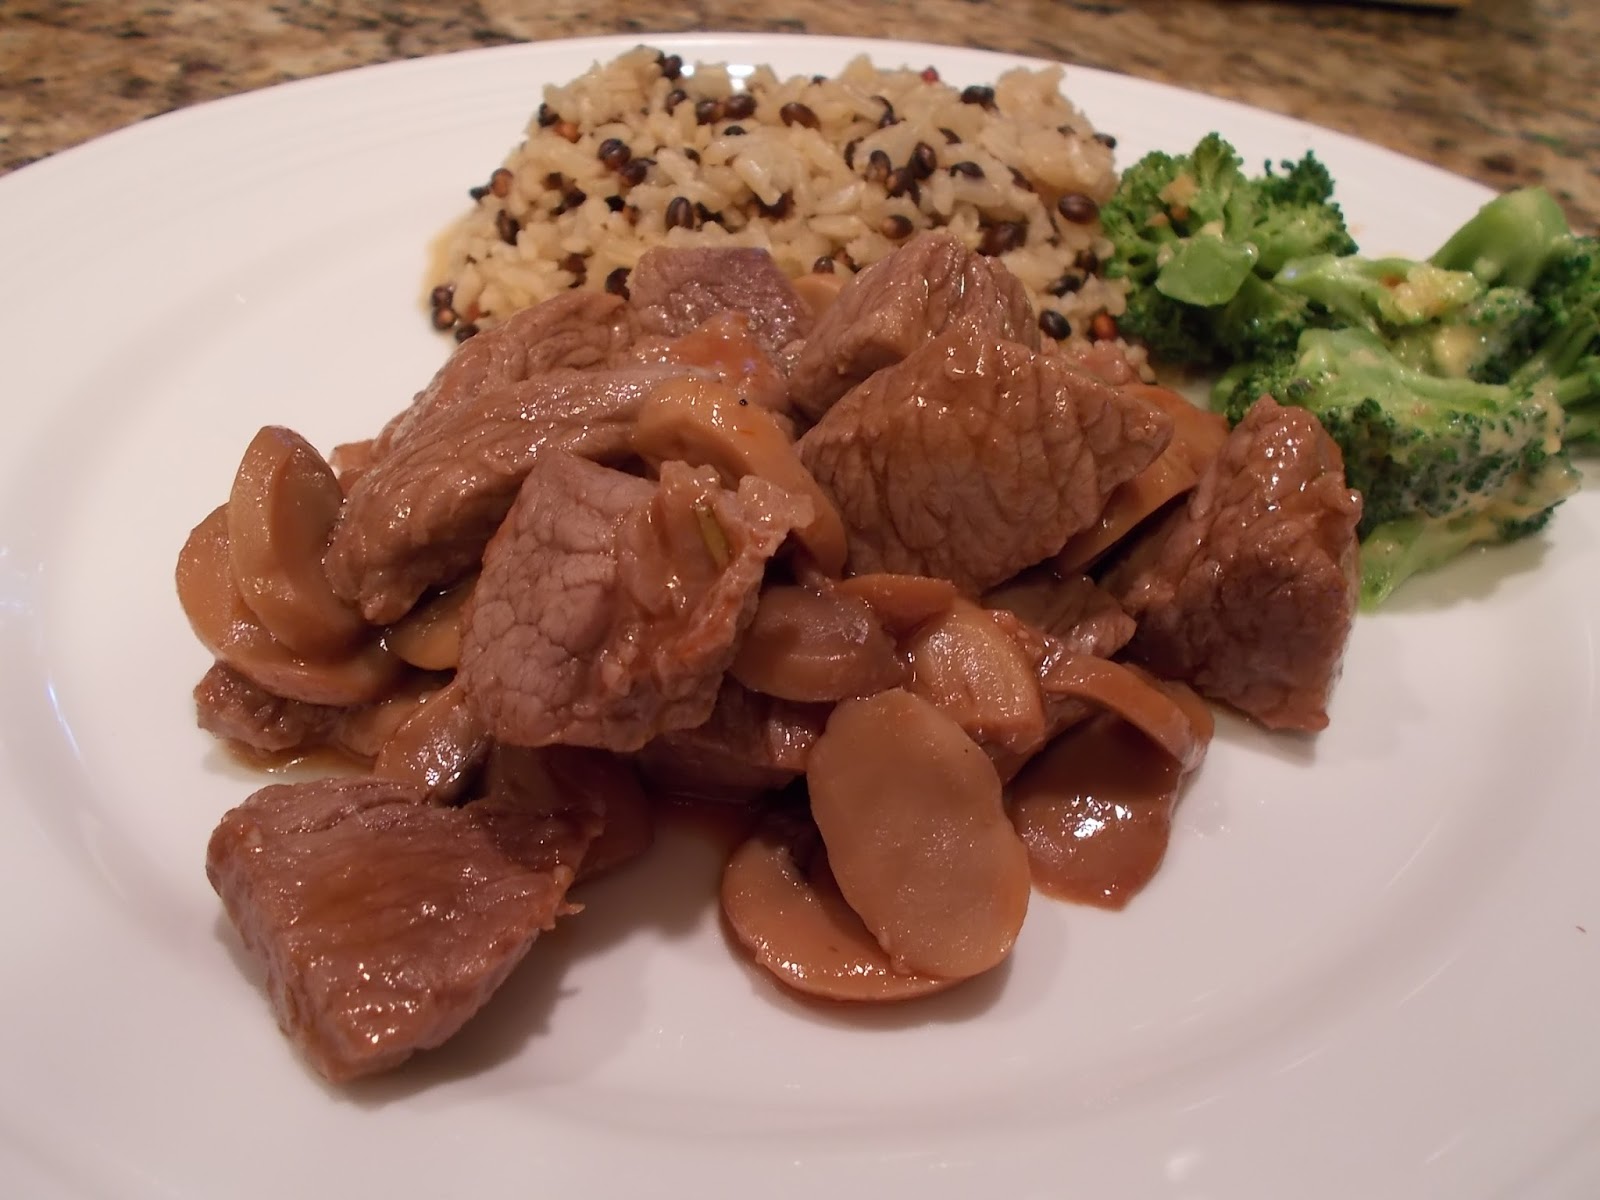
    Sirloin Tips w/Mushrooms


    For those of you that know me, you know the hubby and I (and Eli & Henry) are moving back to Atlanta! We are so excited, but it’s a stressful time. David is already working and living in Atlanta and comes home on weekends. When he comes home, I want to cook him some delicious meals. He eats Subway all week for dinner and that’s just not acceptable! I found some beef tips in the freezer and decided I needed to make something with them. I found this recipe on allrecipes.com. I’m going to tell you one change I would make up front. The liquid was a little thin and I would prefer it to be more of a gravy. The next time I make it, I will flour the meat prior to browning it so it will make a thicker sauce. Since it wasn’t thick this time, I whipped up a little cornstarch and liquid mixture and added it back to the pan. That helped. So my recommendation is flour the meat first. Got it? Okay, let’s move on with this recipe. Here’s what you need to get started.

    Ingredients:

    3 Tablespoons
    3 cloves garlic, minced
    1.5 pounds beef sirloin
    1 – 16 oz can mushroom slices, with liquid
    1 – 8 oz  can tomato sauce
    salt and pepper to taste
    3/4 cup red wine

    Directions:
     
    Cut beef into cubes and lightly flour. In a large skillet over medium/high heat, heat the olive oil and brown beef cubes with the garlic.


    Add mushrooms with liquid, tomato sauce, salt, pepper and red wine. Cook for 30 minutes or until beef cubes are tender. Add a little more wine while cooking if desired.
     
    Of course, you'll want to serve this with some rice (or other yummy starch) so you can enjoy more of the liquid/gravy!