Tuesday, November 27, 2012

Lemon Garlic Chicken Crock Pot Recipe


Who doesn’t love cooking in the crockpot?? I mean, come on people, it is so easy and everything comes out so moist and delicious. You have absolutely no excuse not to get one. Of course, now that I’ve rejoined the working world I enjoy mine more and more. Luckily I have lots of recipes already on my Pinterest so I pulled this one out the other night. BTW, two things you need to do….get a crockpot and join Pinterest! I have found so many great recipes there. It’s awesome.

As I was saying, I love a great crockpot recipe, but a super flavorful one and I am even happier. This one is really garlicky (which I love) and a little zesty too. But wait, that’s not all, it’s also really low fat. The site I found this on claims it’s only 3 Weight Watchers points per serving. Now that’s a bargain!


Ingredients:


 - 8 boneless skinless chicken breasts (I didn’t have breast so I used thighs instead. I seem to always buy those instead)
- 10 garlic cloves, finely chopped or minced
- 2 yellow onions, chopped
- 2 cups fat free, low sodium chicken broth
- 1/4 cup lemon pepper seasoning (I cut this back by half, but do as you wish)
- 4 tbsp paprika (I also thought that was a lot so I cut it in half, but do whatever floats your boat)
- 2 tbsp fresh parsley, finely chopped
- 1 tablespoon kosher salt
- 1 tsp lemon zest


Directions:


 Rinse the chicken and pat dry. Mix together the lemon pepper seasoning, paprika and salt. Coat the chicken with the spice mixture. Place the coated chicken in the crock pot and cover with the fat free chicken broth, garlic cloves, parsley and onions and lemon zest. 


Cook on low heat for about 3-4 hours (or until done).


I served with a little whole wheat pasta with garlic, olive oil and kale. A very delicious and healthy meal!


Tuesday, November 20, 2012

Apple Pecan Pie w/Caramel drizzle - so delicious!


I love apple pie! Not just any pie, only Apple pie. Don't be trying to make me eat cherry or lemon or keylime, APPLE is the only pie I like and nothing will ever come between us. If apple pie is listed on a dessert menu, especially apple crumb pie,  I'm getting it! I love the cumbly topping. Yummers! This is my dad's recipe and when I first tasted it, I knew I had died and gone to heaven. It is seriously the best apple pie you will ever taste. I'm not kidding! I have tasted many apple pies and this really is the best one. It has a lot of pecans added and the caramel sauce just puts it over the top. It is so dang delicious. I have some apples at home from a recent apple picking trip and I believe an apple pie is in my future! Are you ready to learn how to make the best apple pie on the planet?? Let's get started:

Filling:
5 sliced and peeled apples
1 tsp vanilla
1 cup chopped pecans
½ cup brown sugar (dark or light – I use light)
4 Tablespoons white sugar
4 ½ tsp ground cinnamon
1 Tablespoons cornstarch
1/3 cup caramel topping
1 deep shell pie crust
3 Tablespoons melted butter

Topping:
¾ cup all purpose flour
¾ cup chopped pecans
¼ cup sugar
6 T butter (melted)
1/3 cup caramel topping

Toss sliced apples with vanilla. In separate bowl combine pecans, sugars, cornstarch and cinnamon; add to apples and toss to coat apples. Drizzle caramel sauce over bottom of pie shell.  Pour in apple mixture. Drizzle with melted butter.

Combine flour, pecans and sugar. Pour in butter until mixture is like coarse crumbs. Sprinkle over filling.

Bake at 350 degrees for about 65 minutes or until  browned. Drizzle with caramel while still hot. Cool on wire rack.

What's better than one pie?? TWO pies!

Wednesday, November 14, 2012

Hearty Veggie Soup

It’s getting colder so it’s getting time for some great soup recipes! We love good soup around here! Well, who likes bad soup?? I’ve already made chicken noodle soup, the hubby’s favorite, now time for my favorite, a yummy veggie soup with pasta. Mmmm....mmmmmm.....good. This really is a great recipe. It’s very hearty and healthy. What’s better than that, right? Thanks again to Pinterest I found the start of a good recipe. I found a couple of recipes that I liked, combined a few ingredients, added a few of my own and viola, you have the perfect veggie soup recipe. You are so welcome. I am here to make things easier on you. This is your one stop blog for the best recipes ever! Yes, I am just a bit prejudiced on that. Can you blame me though? I’ve really made some yummy things. I’m not bragging. Trust me, I’m still amazed that  I even attempted some of these recipes! If I did it, you can do it too. Want to know how to make a delicious vegetable soup?? Let’s get started:
Ingredients:
2 Tablespoons olive oil
4 carrots, finely chopped
4 ribs celery, finely chopped
1 onion, diced
2 zucchini, diced
3 – 14 oz cans diced tomatoes
4 cloves garlic, minced
6 cups chicken stock
1 Tablespoon finely chopped rosemary leaves
1 Tablespoon thyme
2 bay leaves
handful fresh parsley
2 cup pasta shells
salt and pepper to taste
1 pound ground turkey
Directions:
Brown turkey in a separate pan. While meat is browning, in a large pot, over medium heat, cook onions, celery and carrots until soft. Put the lid on and cook about 20-30 minutes (that’s how long it took mine to get good and soft). We want those veggies to get good and soft. Remember, no crunchy veggies in our soup!


Such a pretty veggie medley

Add zucchini and garlic and cook for another 5-10 minutes, until squash is soft.

Stir in rosemary, thyme, salt and pepper and stir. Add can tomatoes, meat and chicken stock. Bring to a boil then simmer over low heat for 20 minutes.

How pretty does that look??? Yummers!

Add pasta, cook about 10 minutes or until pasta is done.


Add fresh parsley, salt and pepper to taste and enjoy!


You can also make this soup without the meat and it will be just as delicious. I needed to add the meat for the hubby. He might wonder what’s up if I serve him a meal without meat! :-)

Wednesday, November 7, 2012

Braised Ribs

My friend, Giada, taught me how to make Braised Ribs back when I used to get to watch the Food Network every day. I miss those days. Why do we all have to work anyway?? We’ll ponder that another day. I have made them many times since. This is one of the husbands’ favorite dinners now. He’s always loved Country Style Ribs, but braising them is just the icing on the cake. It takes a lot of time, but it is well worth it. You can use beef short ribs, but using bone in country style ribs is the bomb! I love when your entire dinner is all in one pot too! The broth this creates is awesome so you’ll want to spoon that over the ribs and veggies. Save it, it's Delish!
 
 
Here’s how you can make this delicious dinner:
 
 
Ingredients
 
4-6 Country Style Ribs, bone in
2-3 celery ribs, largely diced
3-4 carrots, largely diced
1 cup chopped tomatoes
1 medium onion
2 cloves garlic
2 Tablespoons tomato paste
red wine (about 1/4-1/2 cup)
2 bay leaves
bunch fresh thyme
1 spring rosemary
1/8 teaspoon red pepper flakes
About 2 cups chicken stock
Olive oil
 
 
Directions
While you are chopping veggies, brown ribs on stove top in Dutch oven and remove.
Heat about 2 T olive oil in Dutch oven, then add diced celery, carrots, onion, tomatoes and sauté. Add 2 cloves garlic after veggies soften. Stir and add 2 T of tomato paste. Again, the squeeze tube is the best invention ever!
Once veggies have softened, deglaze with red wine, just a bit.  Sprinkle red pepper flakes over veggies, add bay leaves, thyme and rosemary. Add meat back to pot and pour in chicken stock until it is about half way up the meat. Do not cover it totally.
Bring to a simmer on stovetop then cover and put in 350 degree oven. Cook 2 hours with lid on.
Take it out and enjoy one of the best dinners of your life! Yes, it splatters and gets the Dutch oven all dirty, but it sure is worth it! So yummy!

Sunday, November 4, 2012

Dinner at 525 at The Berry Burk


It’s been a while since I’ve blogged about one of my fabulous dinners. I usually post my pics directly to Facebook and forget to come back and blog about them. Ironically, my food pics are the reason I started this blog but got carried away with cooking as a result. Let’s get back to Dawn’s Blogalicious’ roots!


My dinner club tried out a new restaurant in Richmond, 525 at The Berry Burk. It is in the old Berry Burk building, across from the Carpenter Center. It is such a great space. If you live in Richmond, you know how hard it is to find a restaurant that has more than 10 tables or that will even take reservations for a party less than six.  Most of the restaurants downtown and in the Fan are very small. This one is a very large space, you’ll forget your downtown. Well, you’d forget except for the large windows surrounding you. It really was a great space. I know I don’t usually write like I’m writing a restaurant review, but if you live in Richmond, you know how hard it is to find a nice space to take a larger group. Okay, enough about the space, the food was awesome too!


They have lots of small plates, which made me happy because I got to sample a few things. I really loved everything I tried. I will definitely go back! I couldn’t really decide between a few plates so Amy and I decided to split a started appetizer so we could both get the scallops. They sounded awesome, and didn’t disappoint.


We started with the Fried Pork Pot Stickers which were yummy! Don’t you think they look yummy in their photo? I do love a pot sticker and these were crunchy which made them even better.


Then we moved onto to the best dish of the evening! This caught the attention of everyone at the table…..Seared Sea Scallops with Sweet Pea Lobster Risotto! What’s that you say? Scallops AND you’re going to throw lobster into my risotto??  This dish lived up to the hype. The scallops were cooked perfectly (Chef Ramsey would be proud), but the risotto was really surprising. I mean, I love risotto, but I didn’t think this one would be out of this world. It was super flavorful! You might not be attracted to a normal sweet pea risotto, but throw some lobster in there and it just because delectable! Highly recommend this dish.


And of course we had to finish the night with a few desserts. I went for the obvious choice, Motlen Lava Chocolate Cake. Everything you expect it to be, except they went one step farther with the nutella whip cream….delish! The other girls tried out the Crème Brulee and Bourbon & Pecan Bread Pudding. They seemed pretty happy as well.


Perfect evening…..a great meal shared with great friends. We’ll definitely hit this place again!

Tuesday, October 30, 2012

Sue's Carrot Cake

Carrot cake is my husbands all time favorite cake in the world.  This is not an exaggeration, he LOVES carrot cake!  And he doesn’t just like any carrot cake, all carrot cake in the world is measured up to the cake he remembers from his childhood, his mother’s recipe. He found one that measured up at the Mixing Bowl in Richmond, but apparently they have recently changed their recipe and it no longer measures up. My amateur pallet thinks it still measures up, but he’s the expert and it just won’t do anymore. So I had to take drastic measures.....I had to learn how to make the cake his mother made. This is stressful because what if it’s not as good as he remembers? Is that my fault? Can I make it like his mother did? What if she had some secret ingredient that she didn’t tell me about? So many things running through my head, but I sucked it up and made the cake! I’m a good wife, his birthday is coming up, so I figured, let’s tackle this sucker. And tackle it I did!! That’s right, he loved it! Let’s all breath a collective sigh of relief. It was everything he remembered about his mother’s. Well, at least he’s telling me that. He probably doesn’t want to hurt my feelings. That’s fine, I’m happy thinking I can make a carrot cake he loves. I’m sure his mom sprinkled her cake with love and some other magical ingredient, but thanks for sharing your family recipe from the 70s, Sue! Hopefully Sue doesn’t mind if I share her family recipe with a few of you guys. Okay, are you ready for the best carrot cake recipe ever?? Here it is......

Ingredients:
2 cups sugar
1 1/2 cup oil (use all of the oil!)
4 eggs
3 cups grated carrots
2 cups all purpose flour
2 teaspoons cinnamon
2 teaspoons baking soda
1 teaspoon baking powder
1 teaspoon salt
1 teaspoon vanilla
1 cup chopped nuts (I used walnuts)

Directions:
Okay, first of all, yes that does sound like a lot of oil, but trust me, we needed it. The first time I made it I reduced it by 1/2 cup and it could have been a little more moist. My  husband is all about the moistness of the carrot cake so I made it again for his birthday this week with 1.5 cups of oil and it was the moistest bestest cake you ever tasted! Trust me, don't reduce it!
Blend sugar, oil and eggs together until mixed well. Add grated carrots, mix until incorporated. Sift together flour, cinnamon, soda, powder and salt. Add 1/3 of dry mixture at a time to carrot mixture. Continue until everything is mixed well.
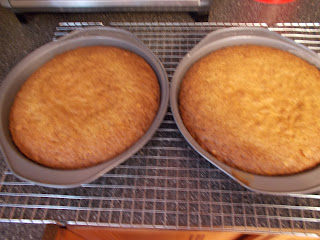
I prefer to make this in two 9” rounds because you get more icing in the center.  We love the cream cheese icing. Feel free to make a sheet cake like David’s mom always did. If you make a sheet cake, you’ll only need half the icing recipe.
Divide cake batter into rounds, bake in 350 degree oven for 35 minutes. Check after 30 minutes, especially if you cut back on the oil. Mine was perfect at 33 minutes. You don’t want it to over bake.
Now, while that’s baking, of course you’ll want to make the cream cheese icing. That’s really why you make carrot or red velvet cake!

Icing:
12 oz. cream cheese  (softened)      
1 stick unsalted butter (softened)
1 1/2 boxes powdered sugar         
1 tsp vanilla
Mix until smooth and spread generously on the 2 layers. 
Now cut a slice and enjoy the best carrot cake you’ll ever taste!
I made the icing recipe for a sheet cake (half) this time, but next time I'll use the quantites above and will have lots more icing to go around. It was a little sparce in the center for our liking. We like lots more! It didn't hurt the flavor though, the cake was still delicious.

Update: Made it again with all of the oil and all of the icing and it was perfect! Trust me!!

Tuesday, October 23, 2012

Chicken Noodle Soup


What is better in the winter time than homemade chicken noodle soup?? Nothing I tell you! The kitchen smells so good as it’s cooking and it makes the perfect meal. Full of veggies, chicken and just plain ole deliciousness. It’s my husbands favorite soup so he’s pretty happy that I’ve perfected this recipe. I’ve had a flop or let's call it, "not quite flavorful enough soup" in the past so I’ve upped the herbs and now it’s perfect! I’m writing this as mine simmers so I can’t wait to dig in at dinner time! And it's really simple, a huge plus!
Here’s what I did to prepare the soup. Before I went to bed the night before I was going to make it, I put a whole chicken in the crockpot and let it cook overnight. I also filled up the crockpot with water, a few stalks of celery, onion, peppercorns and garlic so that I’d also be making the broth all at one time. How’s that for multi-tasking?? I thought it was pretty ingenious so I hope you are a little bit impressed. This soup is so much better with homemade broth, but it’s also delicious with store bought broth. I made it for my parents this summer and didn’t have homemade broth and it was still perfect. They  loved it! Okay, enough talk, let’s get to making the best chicken noodle soup ever!
Ingredients:
4 Tablespoons olive oil
1 onion diced
6 stalks celery – sliced
6 carrots – diced
1.5 tablespoons chopped fresh rosemary (or dried)
1.5 tablespoons chopped fresh thyme (or dried)
1.5 tablespoons chopped fresh Italian flat leaf parsley (or dried)
4 quarts (plus) chicken broth (homemade if you have it).
3.5 cups cubed skinless, boneless chicken breast meat
16 oz package egg noodles
salt and pepper to taste
Directions:
In a large pot, over medium heat, cook onions, celery and carrots until soft. Put the lid on and cook about 30 minutes (that’s how long it took mine to get good and soft). I don't want to bite into crunchy carrots in my soup......it's happened before!

Add rosemary, thyme and parsley and stir. Simmer for another 5 minutes and add chicken stock, noodles and chicken cubes. Simmer over low heat for 30 minutes. Salt and pepper to taste and enjoy!

Look how flavorful the homemade broth looks with all the herbs. Yummy!
I keep extra chicken stock on hand because as you eat this soup it seems to need more. I’ve probably added another 4 cups or more as the week went on while we enjoyed it for many meals. It's so good! I promise. :-)

Tuesday, October 16, 2012

Cilantro Lime Rice

 
Hello, my name is Dawn and I'm a carboholic! Yes, I love all things rice, pasta and bread! You may have suspected that by reading this blog, but I thought I'd go ahead and confess so I'd feel better. Whew, that did help a little.
 
So the hubby doesn't love rice as much as I do so I try to jazz it up so he won't notice that it's just rice. Shhhhhh. I could have it every other meal, but him, not so much. Well, what's left for me really to do but trick him just a little? Please don't tell him that I'm trying to trick him with jazzed up rice. I don't think he's noticed so mum's the word!
 
We were having some quick and easy burrito's one night last week and I thought, "oh boy, here's a night to throw in a delicious rice dish!" But I even stepped it up a notch this night. See, he loves cilantro so I searched the internet looking for a Mexican rice dish with cilantro. I remembered my friend, The Pioneer Woman, making a similar dish so I set out to find it. Well, hers seemed fine, but I thought I could make it better, so I did. I mean, what does she know with her silly blog and cooking show?? I'm practically a chef! Here's my version of Cilantro Lime Rice. The lime juice really makes this taste fresh and yummy!
 
Ingredients
 
1 Tablespoon olive oil
3 cloves garlic
1 large onion, chopped
2 cups long grain rice
1 teaspoon salt
3-4 cups chicken broth
1 can diced tomatoes with green chilies, I used Rotelle
Juice of 3 limes and zest of 2 (hold back juice of 1 lime for garnish)
1/4 cup chopped cilantro
 
Directions
 
Heat oil in large skillet over medium heat. Add the garlic and onions and cook for 3 to 4 minutes. Reduce heat to low and add the rice and salt. Cook over low heat for 3 minutes, stirring constantly to make sure rice doesn’t burn. Add 2 cups of the broth, tomatoes, and the juice and zest of 2 limes and bring to boil. Reduce the heat to low, cover and simmer for 10 to 15 minutes or until the rice is done. Add more liquid as needed. I used brown rice so remember you’ll need to cook a little longer and most likely need more liquids as you go. The rice shouldn’t be sticky.


Just before serving stir the juice of 1 lime and cilantro into the rice mixture.
 
Serve with some delicious tacos, burritos, or whatever floats your boat, and enjoy!!
 

Thursday, October 11, 2012

Mini Blueberry Turnovers

I feel like I say I love blueberries a lot, but I really do! I think my problem is that I just love food a lot! I haven't really loved blueberries this much all my life though.  I really started loving them when I started cooking with them fairly recently. They really are delicious! And good for me, right? Full of antioxidants so it's practically a healthy mini pie! I think you might lose weight if you make this recipe.
David and I were sitting around watching TV the other night and I started getting a craving for a tasty treat. I hopped around on the internet looking for a mini blueberry pie recipe and couldn't really find what I was looking for. I had crescent rolls in the fridge and blueberries in the freezer and needed to make a recipe work with that. I found enough to piece this together and I was pretty pleased at how these pies turned out. They really were delicious. I'm not kidding. David was quite pleased with his TV snack while we waited for the Amazing Race to come on.
Here's how to make Dawn's Blogalicious Mini Blueberry Turnovers.....
Ingredients
1 cup fresh or frozen blueberries. I find the the frozen wild ones work the best because they are small and work better in a mini pie.
1/4 c sugar or Splenda
2 Tablespoons flour
1 teaspoon lemon juice
1/8 teaspoon salt
1 can crescent rolls
Directions
Mix all ingredients together in a bowl.
Prepare the crescent rolls for filling. Unroll two (keep attached) and cut in half so it is a square instead of triangle. Press two pieces together to secure.
Place a spoonful of filling in one side of the roll, fold over and press edges closed. Mine were pretty full and bursting at the seams, but I just worked with it until it was sealed.
Press a fork around edges to crease and seal. Also cut a slit in the top of each so the steam can escape. Some of them were already popping open so I didn't have to cut an additional slit.

Cook according to the crescent roll package, which should be 10 -12 minutes.  I cooked mine the full 12 minutes so that they were nicely browned.
Now you could stop here or go one step farther and make this delicious glaze to drizzle on the top. I say kick it up a notch and drizzle!
Glaze
This made a lot of glaze for 8 mini pies so I'll probably cut it in half unless I'm making a double batch.
 
3/4 cup powder sugar
1 Tablespoon lemon juice

 
That’s it! Could that be any easier?? Mix it together well and drizzle on top of the pies.
Now all you have left to do is serve warm and enjoy! These are such delicious little pies. You won't be able to eat just one.....David and I have proven that! I hope you enjoy these as much as we did.

Sunday, October 7, 2012

Dawn's Awesome Marinara Sauce


That's right, I named this DAWN'S Awesome Marinara Sauce because it's MY recipe. I wrote it. Are you impressed? Well, I am! Wait, does this make me a cookbook author now?? I think it does. Remind me to add that to my resume' later.
Okay, one of the many things that I love is pasta with red sauce! I love it, I can’t get enough of it, but I had never made it from scratch until recently. The jar was always my friend. I know, I should be ashamed, but I’m not! My husband’s Aunt Joanne makes the best homemade sauce. When she comes down for a visit she and her sister, Sue (my mother-in-law) cook lots of sauce and jar it with her delicious meat balls so we all have lots in the freezer. Well, since Aunt Joanne can’t come down all the time and for some reason she hasn’t tried to ship this to me, I’ve had to come up with my own recipe. I’ve tried one of Rachel Ray’s recipes and tried to recreate Aunt Joanne’s but it just hasn’t been perfect. So I got in the kitchen and kept adding things until I thought it tasted perfected and here’s what I came up with. I’ll have to admit, it’s pretty darn good sauce. I’m still mastering it so don’t be surprised if this recipe changes from time to time.
Ingredients
3 Tablespoons olive oil
1 medium onion, chopped finely
6 cloves garlic, minced
1/2 cup white wine or chicken stock
3 Tablespoon tomato paste
1 Tablespoon dried oregano
1 Tablespoon dried basil
I Tablespoon dried or fresh parsley (if using fresh, add a little more)
1/4 c (plus) fresh chopped basil
1/2 teaspoon salt
2-3 bay leaves
1 teaspoon red pepper flakes
2 cans (28 oz each) crushed tomatoes
Grated parmesan cheese for garnish

Directions
Add olive oil to pot or dutch oven, heat and sauté onion for 3-5 minutes. When onions have softened add garlic and continue to sauté for another minute or so.
Deglaze with white wine or chicken stock. After most of the liquid has absorbed, add 3 T of tomato paste (the tube is the best invention ever), red pepper flakes, salt and all dried herbs. 

Best invention ever!

Stir and add 2 cans of crushed tomatoes and bay leaves. Put lid on and simmer for 30 minutes to an hour. If you have an hour to spare, go for it because they just gives the flavors more time to marry and become even more delicious. Right before the sauce is finished, add the fresh basil, stir in sauce, but save a little for garnish. I think the sauce tastes brighter if you throw in some fresh basil at the end, but don't worry if you don't have it. It is still going to be delicious!

Now let's simmer for an hour or so.
Now I don't usually just serve the sauce, I need some meat in there somewhere. Luckily I had a few of my special meatballs in the freezer so I added those to the sauce while it simmered for an hour. I'll write that recipe another day. You can also add ground beef or turkey, but one of our favorites is to add Italian sausage links. Yummers!

Doesn't it look delicious after it's simmered for over an hour??


Serve the way you like it best over pasta and enjoy!